First of all, I apologize for my lack of posts in the past couple of months. Our family has been busy packing and preparing for a big and really exciting move: we're buying our first house! We'll be closing on the house and moving next week, so I'll be MIA for a little while longer.
In the meantime I wanted to inform those that read this blog that I'll no longer be posting on Jill Of All Trades. Instead I've decided to post all my projects and recipes, as well as our family updates, on my personal blog. This way I can dedicate all my attention to one blog so I'll have better, more interesting content to post more often.
If you'd like to follow my personal blog, click HERE to be directed to it.
Thanks everyone for your patience and hopefully I'll have some great home improvement and decor posts up shortly after we move!

Friday, February 24, 2012
Monday, January 2, 2012
Mexican Meatloaf
Happy 2012, y'all! I hope you had a wonderful holiday season with your families!
Since so many people (myself included) make resolutions in the new year to lose weight, I thought I'd start off the year with a delicious, healthy recipe! This is a staple in our house and I make it at least once or twice a month. After trying it, I promise you'll never want plain old boring meatloaf again! It's super tasty and spicy and just plain YUM!
Ingredients
1 lb. ground turkey
2 egg whites
1 box (6 oz.) cornbread stuffing mix
1 medium onion, chopped
1/2 tsp. chili powder
1/4 tsp. cumin
1 can (4 oz.) chopped green chiles
1 can (10 oz.) mild enchilada sauce
Directions
Preheat oven to 375 degrees. Coat a large loaf pan well with non-stick cooking spray.
Combine ground turkey, egg whites, stuffing mix, onion, chili powder, cumin, green chiles, and half of the enchilada sauce in a large bowl. I usually start off mixing it with a spoon, but your hands always work the best for this!

Pour mixture into greased loaf pan and spread evenly with a spoon (or your already yicky hands).

Put loaf pan in oven and bake for one hour. Pour remaining enchilada sauce over meatloaf and cook for another 5 minutes.
Cut into slices and serve with Spanish rice.

(It looks much better in person. Just sayin', don't trust my crummy pictures.)
Friday, December 16, 2011
Snowflake Lampshade
Most of my Christmas decorations are up, but I've been adding a few little things here and there for the last week or so. Last night I was looking at a great tutorial for making paper snowflakes and had a lightbulb moment. I took a piece of junk mail (we all have too much of that lying around, don't we?) and cut out a large snowflake. Then using scotch tape I attached it to the inside of the lampshade in our living room.


Isn't it pretty? I love that the different colors from the junk mail ad come through the lamp to make it look multicolored.

It was free, quick to make, and added a lot to the room. What more could you ask for?

Voila!

Isn't it pretty? I love that the different colors from the junk mail ad come through the lamp to make it look multicolored.

It was free, quick to make, and added a lot to the room. What more could you ask for?
Thursday, December 15, 2011
Journal Giveaway!
My amazing aunt is hosting a giveaway for one of my Ten Year Journals over on her blog! Head over to Organize and Decorate Everything to enter to win! The giveaway closes on Monday. She's also got a promotion code for 15% off everything in my shop!

Also, please visit Craft Gossip's IZZE Holiday Crafting Challenge and vote for my aunt's "Fun and Festive Holiday Table" (#6). She has the best craft in the challenge (and I'm not just saying that because she's my aunt) and when you vote you automatically get entered to win a $50 Target gift card and some IZZE swag. Win-win!

Also, please visit Craft Gossip's IZZE Holiday Crafting Challenge and vote for my aunt's "Fun and Festive Holiday Table" (#6). She has the best craft in the challenge (and I'm not just saying that because she's my aunt) and when you vote you automatically get entered to win a $50 Target gift card and some IZZE swag. Win-win!
Tuesday, December 13, 2011
In the Shop: Washer Necklaces
I just listed a bunch of washer necklaces I've made from vintage road maps, scrapbook paper, and even a few that are my own design. If you need any last-minute stocking stuffers these may be just what you're looking for!

Click HERE to visit my shop and take a peek at the new items I've listed!

Click HERE to visit my shop and take a peek at the new items I've listed!
Monday, December 12, 2011
Weekend Project: Tiled Portrait Mural
Last weekend I decided I really wanted a large piece of art to hang in our kitchen, but with Christmas just around the corner my budget was exactly $0. Solution: blow up a family picture on the computer, print it out, and stick it to the wall!

It was pretty simple to do. Here are the steps I followed.
1. Using Photoshop or another photo editing software, blow up/crop your photo so that it will evenly divide into 8x10-inch pieces. (For example, I made our photo 48"x30").
2. Use grid or ruler lines in the program to divide your enlarged photo into 8x10" sections. Print each section so you've got a bunch of 8x10 sections of your picture. (Note: to save on colored ink, print in black and white).
3. Using a paper cutter or scissors, trim each section of your photo and lay them out in a grid on the floor so you know which page goes where.
4. Decide where you want your mural to be, and using a laser level start attaching your grid pieces to the wall with poster putty. You can measure the distance between each paper if you want to get really OCD about it, but I just eyeballed it.

What do you think? I really love it except for the fact that my face has been split down the middle. Not sure if I'll be able to deal with it or if I'll try another photo layout that will keep my face intact. In any case, it was cheap, relatively easy, and cost me basically nothing! Can't beat that!

It was pretty simple to do. Here are the steps I followed.
1. Using Photoshop or another photo editing software, blow up/crop your photo so that it will evenly divide into 8x10-inch pieces. (For example, I made our photo 48"x30").
2. Use grid or ruler lines in the program to divide your enlarged photo into 8x10" sections. Print each section so you've got a bunch of 8x10 sections of your picture. (Note: to save on colored ink, print in black and white).
3. Using a paper cutter or scissors, trim each section of your photo and lay them out in a grid on the floor so you know which page goes where.
4. Decide where you want your mural to be, and using a laser level start attaching your grid pieces to the wall with poster putty. You can measure the distance between each paper if you want to get really OCD about it, but I just eyeballed it.
DONE!

What do you think? I really love it except for the fact that my face has been split down the middle. Not sure if I'll be able to deal with it or if I'll try another photo layout that will keep my face intact. In any case, it was cheap, relatively easy, and cost me basically nothing! Can't beat that!
Wednesday, December 7, 2011
DIY Cupcake Stand for under $4
Last weekend was my son's first birthday, and although I wanted to go all-out for him, I also had a limited budget with Christmas coming up soon. Because of this I knew I needed to get creative when it came to the decorations and serving dishes. I went to my local thrift store looking for inspiration and came across this strange looking thing-a-ma-doodle:

Anyone know what it is? I think it may have been used to hold salt/pepper and oil bottles? Maybe? Who knows. In any case, I thought it would work great for the base of a cupcake stand. Y'know, aside from the fact that it was insanely lopsided. But hubby made quick work of that and filed down one of the feet to make it level.

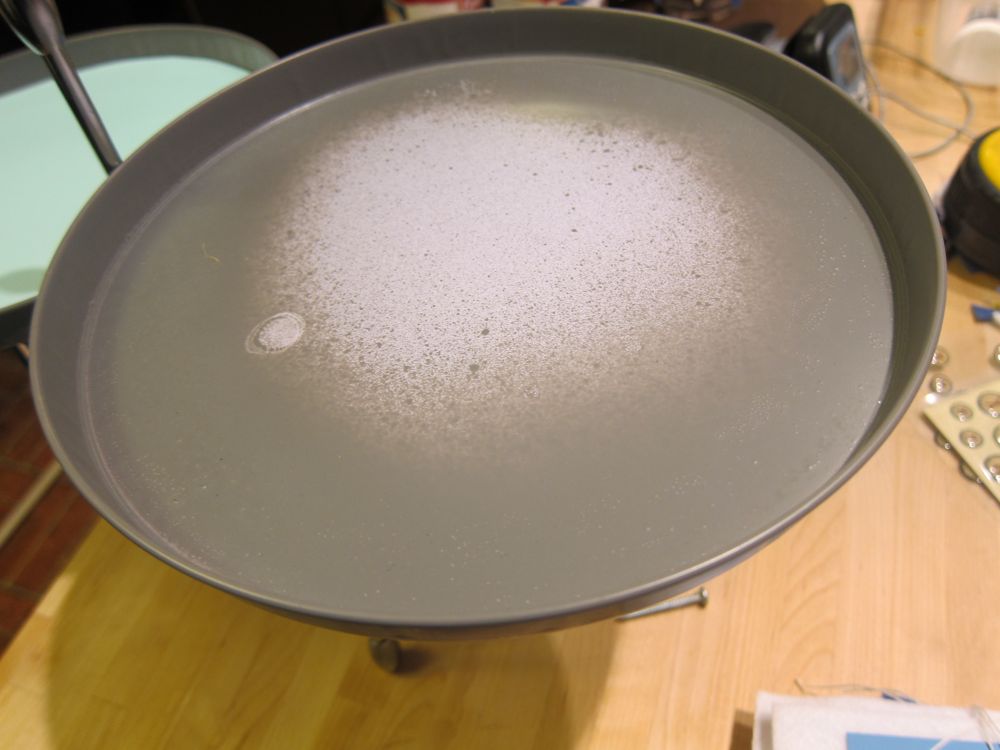
Next I took three stove burner covers I bought at the dollar store and spray painted both sides of the rims dark grey.

Then I cut some scrapbook paper to fit inside the burner covers. I didn't glue them down at all so that I can use the stand again for other parties and color-coordinate the paper for any event.

I glued the burner covers to the thing-a-ma-doodle (yep, I'm just going to keep calling it that) with some trusty E-6000 glue and used some canned food to keep everything in place while the glue dried.

Ta-da! I think it turned out so great and these little fishy cupcakes looked so cute on it.

I love cute cupcake and cake stands, don't you? I think somehow food tastes better when you serve it in a pretty way.

Anyone know what it is? I think it may have been used to hold salt/pepper and oil bottles? Maybe? Who knows. In any case, I thought it would work great for the base of a cupcake stand. Y'know, aside from the fact that it was insanely lopsided. But hubby made quick work of that and filed down one of the feet to make it level.

Next I took three stove burner covers I bought at the dollar store and spray painted both sides of the rims dark grey.
Then I cut some scrapbook paper to fit inside the burner covers. I didn't glue them down at all so that I can use the stand again for other parties and color-coordinate the paper for any event.

I glued the burner covers to the thing-a-ma-doodle (yep, I'm just going to keep calling it that) with some trusty E-6000 glue and used some canned food to keep everything in place while the glue dried.

Ta-da! I think it turned out so great and these little fishy cupcakes looked so cute on it.

I love cute cupcake and cake stands, don't you? I think somehow food tastes better when you serve it in a pretty way.
Subscribe to:
Posts (Atom)